Looking for something specific? The User Guide and FAQ are indexed within the app — open
Suspicious Package, click on the Help menu (Command-?), and type in the Search field.
Results listed under Help Topics link directly to the appropriate User Guide section or FAQ entry here.
Opening an Installer Package
If you've recently downloaded a macOS installer package, Suspicious Package shows it on the right side of its “welcome” window:
Double-click the package you want to inspect, and Suspicious Package will open it.
Suspicious Package can't open a disk image (.dmg) file directly. You must open the disk
image first — i.e. by double-clicking it in the Finder. If there is an installer package inside the opened disk image,
it will appear in the Suspicious Package welcome window. See more in the FAQ
If the package you want isn't shown in the welcome window, there are several ways that you can tell Suspicious
Package where to find it:
Use the File > Open command from Suspicious Package, navigate to the package,
and then click Open.
Locate the package in the Finder, and do one of the following:
Drag the package icon onto the Suspicious Package icon, either in your Dock or in your Applications folder.
If the Suspicious Package welcome window is visible, you can also drop the package on top of that (which is
a larger drop target and so may be more convenient to hit).
Select the package icon and choose Finder > Services > Open With Suspicious Package
(under the Development group).
Control-click the package icon and choose Open With Suspicious Package, near the bottom of
the context menu. (This item might be grouped under Services, depending on how many
services are applicable.)
From the Quick Look preview, choose Open with Suspicious Package,
or click on any line with a link indicator
to go directly to that part of the package.
From the Terminal, use the “spkg” command-line
tool to tell Suspicious Package to open a given path.
If you don't see the Open With Suspicious Package item in the Services menu or in the
Finder context menu, choose Finder > Services > Services Preferences, go to the
Development group, and make sure that Open With Suspicious Package is checked.
You can also add a keyboard shortcut here, if you wish, but that's not necessary to make the menu item appear.
On earlier versions of macOS, you could control-click a package and use
Open With > Suspicious Package. However, this no longer works
after the macOS 13.3 update.
Whichever method you choose, Suspicious Package will open the package and show an overview in the Package Info tab:
In addition to opening installer packages, you can also open “installer receipts” with Suspicious Package. For more on receipts,
see below.
Browsing Installed Files
To see the files that will be installed by the package, select the All Files tab:
Or use Window > All Files (Command-2).
Find Like the Finder
The All Files tab is designed to work much like the Finder's list view, so:
Click the disclosure triangle next to a folder to show (or hide) the contents of that folder.
Double-click a folder to open it.
Unlike in the Finder, double-clicking a “special” folder —
such as an application bundle — will simply open that folder. Suspicious
Package will never launch an app as a result of navigating through the All Files view.
Use Go > Enclosing Folder (Command-Up Arrow) to move up a folder.
Use the Path button on the toolbar
to go directly to any folder above the current one.
Suspicious Package also provides quick access to some standard locations via the Go menu. For example, you can go right to
the Applications folder using Go > Applications (Command-Shift-A).
If a location is disabled in the Go menu, the package doesn't install anything there.
To see an item in context, select it and use File > Show Destination Folder in Finder (Command-R). This reveals
the folder where the selected item would be installed, showing any existing version of the item.
Get Additional Metadata
When you select a file or folder in the All Files tab, the Info pane will show any additional metadata
that Suspicious Package has about the item. If the Info pane isn't visible, click the Get Info toolbar button
to show it.
Kind is akin to the Kind shown by the Finder. You can click
on this text to show the underlying Uniform Type Identifier (UTI) that macOS defines for this kind
(e.g. “com.apple.application-bundle”).
If the item contains code, Executable shows the supported processor architecture,
such as Intel — 64-bit or Apple Silicon — 64-bit.
If the app is “universal,” multiple architectures are shown. You can click on this text
to show the underlying symbolic name used by macOS, such as x86_64 or arm64.
Size shows the installed size of the item. Suspicious Package calculates a total
size for folders and other directories, such as app bundles.
Modified shows the modification date and time of the file, as found in the package.
This won't appear for folders or other directories, simply because of the way that macOS Installer packages work.
Owner and Group show the ownership that will be applied to the item
upon install. Typically, this will be the root user and the wheel group,
which is Apple's recommended ownership, but some packages might do something more “interesting.”
You can click on this text to see the full name that macOS gives the user and group, and click once more to
see the numeric uid and gid values.
Permissions are shown in the same way as the Finder's Get Info window. If you'd
prefer to see these in traditional Unix symbolic form, click on the permissions table to toggle the view.
If the item is a bundle, Version shows the available version information, such as you'd see
in a standard About window: the first number is the “short version” and the one in parentheses
is the “bundle version,” which are both significant parts of Apple's standard versioning scheme.
In some cases — mostly in Apple's own packages — there are additional “source” and
“build” versions, which can be seen by clicking on the version text.
If the item is a bundle, Identifier shows the bundle identifier. This is the name
by which macOS knows the app or component, and you'll sometimes see these identifiers used elsewhere,
such as in the name of preferences files or in Console logs.
If the item is a bundle or executable, Requires shows the oldest version of macOS
supported by the component (for any processor architecture), where this information is available. For an app
bundle, you can select either the bundle or its main executable to see the macOS version requirement;
Suspicious Package examines both the Info.plist file and the Mach-O executable to
determine the effective minimum version, and shows this in both places.
(Note that you can also use a rule-based search to find bundles and executables
based on their required OS version.)
If the item is a bundle or executable, it might request Entitlements, which you
can inspect by clicking this button. See more on examining entitlements below.
Most of this metadata is declared by the package, but some — such as the Executable
architectures and the Entitlements — must be extracted from the actual payload of the package.
Especially for a large package, it may take some time for Suspicious Package to finish extracting this metadata, so you
might see an “Analyzing payload” placeholder initially. The progress of this analysis is
shown in the status bar, and when it completes, Suspicious Package will update the Info pane. The
Kind, Identifier and Version might also be updated,
if Suspicious Package finds information that is more accurate.
Most of the metadata attributes can be selected, and thus copied. Unfortunately, this
can make the cycling attributes, such as Kind, a bit squirrelly to work with. If you single-click, Suspicious Package
will still cycle through the different values. If you double- or triple-click, Suspicious Package will instead enter selection
mode, with the appropriate select-word or select-all behavior. If you want to get out of selection mode, so that the
attribute values cycle again, press the Escape key. Or click on the label for the attribute, instead of the attribute value:
this will always cycle the attribute, regardless of selection state.
If you want to see additional installer-specific metadata about component
packages and bundle overwrite rules, turn on Component Package and Bundle Info in
Suspicious Package > Preferences > General.
Get More Information with Quick Look Previews
If you want information that isn't shown on the Info pane, you can
use the macOS Quick Look feature to “preview” the selected item. On the All Files tab,
select any item — including an app or other bundle — and click the Quick Look toolbar button
,
use File > Quick Look Item (Cmd-Y), or press the spacebar, just as you'd
do in the Finder.
Suspicious Package will automatically export the item (into a temporary location) and ask
Quick Look to generate a preview. For example, if you select an app bundle — and if you
have our Apparency app installed — you'll see detailed
information, including supported processor architectures, code-signing information and more:
Of course, you can preview any kind of item — such as a property list, an image or a PDF file. As when
previewing files in the Finder, the results will depend on what third-party Quick Look extensions you have installed and
activated; open System Settings and go to Privacy & Security > Others > Extensions > Quick Look
to see which apps come with Quick Look extensions.
(On macOS 12 or earlier, open System Preferences and go to Extensions > Quick Look.)
If you want information about an app (or other bundle) — and you have Apparency
installed — you can preview the bundle itself or the main executable inside it (e.g. X.app/Contents/MacOS/X),
depending on what information you want. To see the supported architectures, for example, previewing the executable will
suffice (and may take less time and disk space). But if you want to see the code signature or related information, you'll need
to preview the bundle.
If you want to examine the item further, click Show in Finder to reveal the exported item,
or Copy Export Path to copy the path of the exported item to the clipboard, e.g. so you can
paste it into a Terminal command.
To generate the preview, Suspicious Package exports the item to a temporary location, and always adds
a quarantine, to minimize the chance of opening something malicious. Depending
on what you do with the item after revealing it in the Finder, you may get a Gatekeeper dialog, saying that
Suspicious Package “created” the item.
The temporary location that contains the exported item will be cleaned up by Suspicious Package when
you close the window for that package. If you want to keep the item around longer, you'll need to copy it somewhere
else first.
Go Back in History
Suspicious Package keeps track as you navigate through the All Files view. To retrace your steps, click the
Back toolbar button
or use Go > Back (Command-[).
If you hold down the Back button momentarily, you can jump back to a specific point in the history.
Of course, once you've gone back, you can use the Forward button
to go in the other direction again.
Open Additional Tabs
If you find files or folders that you want to come back to, you might find it useful to open additional tabs:
To open another tab identical to the current All Files view, use File > Open in New Tab (Command-T).
To open a new tab with the contents of a specific folder, hold down Command while double-clicking the folder.
To open a new tab for a specific folder without immediately selecting that new tab (a.k.a. Open in New Tab in Background),
hold down both Shift and Command while double-clicking the folder. For example, if you see several folders that you want to examine,
you can Shift-Command-double-click all of them, and then move between the new tabs.
To quickly cycle between open tabs, use Window > Next Tab in Package (Shift-Command-]) or
Window > Previous Tab in Package (Shift-Command-[).
To rearrange tabs, simply drag them around in the tab bar.
To close a tab, click the close button
or use File > Close Tab (Shift-Command-W).
Starting in macOS 10.12 (Sierra), Apple introduced window tabs, which are supported automatically
in most applications — including Suspicious Package. By default, window tabs are used only in full screen mode, but
you can change this in
System Settings > Desktop & Dock > Windows & Apps > Prefer tabs when opening documents
(or on macOS 12 or earlier, in System Preferences > Dock > Prefer tabs when opening documents).
Or you can manage window tabs manually from the Window menu of the app.
Note that the macOS window tabs do not replace Suspicious Package's own tabs. Window tabs represent
different packages, which would otherwise be shown in separate windows. Suspicious Package tabs represent different parts of
a single package, such as Scripts or All Files. When you enable window tabs, you'll see two tab bars, e.g.:
The window tabs are on top, while the Suspicious Package tabs are underneath.
View Installed Property List Files
If the package installs any property list files, you can view these directly from Suspicious Package
(or you can use another app, as discussed below).
For example, if you want to see the contents of some “Info.plist” file, you can select the file and use
File > Show Item as Property List:
If you're looking for a particular key or value, click in the search field (or use Cmd-F) and type the text
you want to find. Suspicious Package will show only the rows that match, or for arrays or dictionaries, the rows that contain matches.
Click the search options button
to choose between searching keys and values, or to restrict the way that text matches.
Click the cancel button
to return to viewing the unfiltered property list.
In a standard “Info.plist” file, most keys are defined by macOS. For these standard keys, Suspicious Package
can usually open the corresponding documentation on Apple's Developer site. Select a row and click
Open Apple Documentation for Key. Or, move the pointer over a key name, and if a link button
appears on the right side, click this to open the documentation.
If the Open Apple Documentation for Key button is disabled, Suspicious
Package doesn't have a direct link for the selected key, either because the key isn't documented or because
we didn't find the documentation to index it. If the button doesn't appear at all, Suspicious Package doesn't
consider the file to be a standard “Info.plist” file, and so doesn't know where to find
documentation for its keys.
Open Installed Files in Another App
In addition to property lists, Suspicious Package chooses a few other kinds of installed files
— mostly plain text files — and makes these available to open in another app.
Select the file and use File > Open Item With, and choose a specific app.
Suspicious Package shows all apps that claim to be able to open the selected kind of file.
You can always choose the Finder, which means that the file will be revealed in a Finder window. This
can be helpful if you want to manipulate it in the Terminal, or in some application that can't
“open” the file, per se, but can import or analyze it.
Suspicious Package also picks a default application (based on the file kind), which can be opened with
Command-Shift-O. If you want to change the default application for all files of the current kind, hold down
Option and use File > Always Open Kind With.
This is meant to work like the Finder's Open With feature.
If File > Open Item With is disabled, the selected file is not one that Suspicious Package has
made available for viewing. Suspicious Package picks files that it suspects will be useful and that are likely to be viewable.
It skips files that are especially large, to avoid using tons of disk space for files that you're unlikely to open. If you
find a file that you want to see but that Suspicious Package doesn't make available, consider
previewing it with Quick Look or
exporting it from the package.
When you use the Open With command, Suspicious Package writes the file to a temporary location, and hands
that temporary copy off to the chosen application. All of these temporary files are removed when you close the Suspicious
Package window for that package. If you want to keep the file around longer, you will need to copy it somewhere else,
or export a copy elsewhere.
View Entitlements for Installed Apps
Entitlements are associated with an app — or some other bundle or executable — and enumerate specific
capabilities that the app requests to do its work. macOS grants (or denies) these capabilities to the app, based on the
entitlements and (sometimes) other restrictions. Entitlements take several forms:
If the App Sandbox is enabled, macOS denies many
capabilities by default (for example, the ability to read or write user files, or to make or receive network
connections). The required capabilities are then granted by macOS if the appropriate entitlement
is present; for example, setting com.apple.security.network.client to YES allows
outgoing network connections. (This ability is limited to the entitlements that are defined by Apple, and for
apps distributed through the Mac App Store, they are subject to rejection by App Review.)
If the Hardened Runtime is
enabled, the scheme is similar: macOS defaults to denying a number of less commonly
needed capabilities — especially ones that Apple deems subject to exploitation if the app is compromised.
If the app actually requires any of those capabilities to function properly, the appropriate entitlements will
cause macOS to grant them. For example, setting com.apple.security.personal-information.location
to YES allows the app to request location information.
Outside of App Sandbox or Hardening, many macOS capabilities and Apple services are available only
to apps or components having the appropriate entitlements. For example, the ability to receive push notifications,
or the ability to use iCloud services, are controlled by entitlements. (Again, these may be subject to
App Review if the app is distributed through the Mac App Store. Outside of the App Store, they may require
a Provisioning Profile.)
A few entitlements relate to the sharing of data between different apps from the same
developer. For example, com.apple.security.application-groups establishes shared folders
which multiple apps can use to store or exchange data.
Finally, there are a vast number of private-to-Apple entitlements, which control access to macOS
services that Apple deems as off-limits to third party apps entirely. The ability to
access Internet Accounts information, or to talk to the App Store, are two examples, but there are
many, and they are undocumented, for obvious reasons. Typically, these entitlements start with a
com.apple.private prefix (but some that don't are probably still considered private). Note
that macOS typically refuses to grant capabilities for private entitlements unless the app or component was
signed by Apple itself.
Suspicious Package extracts the entitlements from the package payload, and makes these available
to view for individual apps, bundles or executables. From the All Files tab, click the
Show Entitlements button in the Info pane, or use
File > Show Entitlements for Item (Cmd-Control-E)
to view the entitlements for the selected item:
If there are many entitlements and you're looking for a particular one, click in the search field
(or use Cmd-F) and type the key you want to find. Suspicious Package will show only the rows that match.
Click the search options button
to choose between searching keys and values, or to restrict the way that text matches.
Click the cancel button
to return to viewing the unfiltered entitlements.
For the entitlements that are not private-to-Apple keys, Suspicious Package can usually open the corresponding
documentation on Apple's Developer site. Select a row and click
Open Apple Documentation for Key. Or, move the pointer over a key name, and if a link button
appears on the right side, click this to open the documentation. (This may be disabled if the entitlement key
isn't documented, or if we didn't find the documentation to index it.)
Alternatively, Suspicious Package can show a “merged” view of all entitlements
requested by all of the executables installed by the package. This can be helpful to get an overall sense
of what the installed software will do, especially when creating a
Privacy
Preferences Policy Control (PPPC) Profile.
Use File > Show Entitlements for All Executables (Cmd-Control-A) to view the
merged entitlements: these are explained further in the FAQ.
Show Launch Information for Installed Apps
macOS has various features that control how and when a specific app or other executable might be launched.
Suspicious Package extracts some of this launch-related information, and makes it available to view for
for individual apps, bundles or executables.
Some launch information isn't readily available from the package payload, so Suspicious Package
doesn't provide all of the same information as
Apparency, which is able to work with the actual installed app. If you need this
additional information, though, you can export the app to open it in Apparency, or
preview it with Quick Look, and then open it in Apparency from there.
From the All Files tab, use File > Show Launch Information for Item (Cmd-Shift-L)
to show the Launch Information inspector for the selected item:
In this inspector, you'll find the following launch-related information:
The Code Signing Identity is used by macOS to grant access to sensitive resources —
such as keychain items or App Sandbox “containers” — in a way that won't break every time the app is updated.
This Boolean expression is a code signing requirement, as explained here.
Suspicious Package adds syntax highlighting and comments to improve the readability of the code signing requirement, so it
won't look identical to the one produced by macOS, e.g. using codesign(1) with ‑‑requirements.
If you want that canonical version of the code signing identity, click the copy button
. You can always copy the canonical code signing identity without opening the Launch Information inspector,
by using Copy Code Signing Identity for Item from the toolbar's Action menu
,
or from the context menu (displayed by Control-clicking).
Any explicit Launch Constraints are shown. As explained here,
a launch constraint has a type that determines which process the constraint is checked against; to view
an individual launch constraint, select one of the listed types.
When you select a type, Suspicious Package shows the corresponding constraint as a Boolean expression — using a bespoke syntax that is heavily
patterned after the code signing requirement language —
with syntax highlighting and some (hopefully) helpful comments.
This Boolean expression syntax is our attempt to make the launch constraint
easier to read and more succinct than Apple's property list format. macOS does not
create nor understand this format for launch constraints.
Searching and Filtering the Installed Files
In addition to browsing through the folder hierarchy on the All Files tab, you can also search for files by name or other attributes.
Searching by Name
To search for files (or folders) whose name contains specific text, use Edit > Search Package (Command-F).
Enter the text in the search field and press Return to do the search:
Suspicious Package will show the matching files and folders. It also lists the nearest enclosing bundle or top-level folder, to
give some context to each match.
To see details for a matching item, select it and examine the Info pane.
The path bar at the bottom of the window shows the complete folder path for the selected item: you can double-click on any folder in the
path bar to open that folder, and show the matching item in context. Then, if you want to go back to the search results, use the
Back button.
Searching Within a Folder
If you open a folder, and then start a search, you'll have the option to limit the search to the contents of that folder.
Use the buttons on the left side of the search bar to switch between the original folder and the entire contents of the package:
Note that searching within a folder considers the entire contents of that folder, no matter how many subfolders it contains.
Filtering on Other Attributes
In addition to the name of a file, you can search on other attributes. For example, you can show all files of a particular kind.
First enter search mode using Edit > Search Package (Command-F). Then click the add button
on the right side of the search bar:
From here, you can add and edit rules, very much as in the Finder. For example, if you choose the “kind” attribute, you'll get a pop-up menu
containing all of the file kinds that are installed by the current package — this is also a quick way to look for “interesting”
kinds of files (such as kernel extensions, or privileged tools):
You can also incorporate file name-based rules here, with more control over the matching of the entered text (such as
a file name that starts or ends with the text, or which matches the case of letters exactly).
Note that, if you hold down the Option key, the add button
becomes an ellipsis button
— this adds a new group of sub-rules, allowing you to construct arbitrarily complex Boolean requirements,
if you should be so inclined.
Saving Searches
Once you've set up a search — especially a complex one involving multiple rules — you might want to save it for later.
A saved search can be reused in any package.
If you have a standard set of things you look for in a package, saved searches are a good way to go.
To save the current search, click the Save As button on the right side of the search bar:
and give the search a name:
Later, you can redo the search by choosing it from the Go menu:
If you modify the search rules, you can click Save As again to either update the search (using the same name as before)
or save it under a different name.
To rename or delete saved searches, use Suspicious Package > Preferences > Searches.
Exporting Installed Files
If you want to examine the contents of a file that would be installed, you can tell Suspicious Package to export
it. Select any file or folder, and use File > Export Item (Command-Shift-E). Choose a name and location, and Suspicious Package will
extract the item from the package.
Alternatively, you can export the selected item directly to your Downloads folder with File > Export Item to Default Folder
(Command-Option-E). Suspicious Package will use the same name as the item being exported, unless there's already an item by that name there.
To change the default folder to use for exports, use Suspicious Package > Preferences > General > Default export location.
You can also drag a file or folder out of Suspicious Package, into the Finder or onto your desktop, and it will be exported to that location.
The macOS installer package format is not optimized for partial expansion, so exporting one small item can take almost as much
time as exporting everything. If you export multiple items in quick succession, Suspicious Package does its best to export them in parallel.
But if you plan to export a number of items underneath a single folder, you may find it faster to just export the folder itself.
Using the Exports List
Depending on the size of the package, exporting a file or folder might take awhile. Click the Exports toolbar button
to see information about running and finished exports.
If you decide you want to cancel a long-running export, click its cancel button
.
To show an exported item in the Finder, click its show button
.
To select an exported item in Suspicious Package, click its info button
.
This can be useful if you forgot where the item would be installed, or want to see what metadata it would have when installed.
Exporting Is Not Installing
The intention of Suspicious Package's export feature is to allow you to inspect the contents of installed files, and not to
behave as a “partial installer.” An item exported by Suspicious Package may differ from the version installed by the macOS Installer
in a number of ways:
The exported item will be written where you specify — or in the default export location — and not
where the package indicates (which is almost always some system location). Suspicious Package doesn't have any
special privileges to write outside of your home folder.
The exported item will have the owner and group of the user running Suspicious Package, and not the owner and
group specified by the package (which will typically be root or some other system account).
The exported item will have permissions that allow it to be examined, changed and deleted by the user running
Suspicious Package, even if the package permissions might prevent such changes. This is done primarily so that
exported items can be easily removed when you're done examining them.
The exported item will maintain any extended attributes specified in the package — these might carry
code signatures or other important information — but it will omit any access control lists, since
those might prevent the item from being easily removed again. (That said, if you do want to
preserve the access controls, you can use File > Export Item (Command-Shift-E), and uncheck
Remove any access controls from exported items before clicking Save.)
An application (or other bundle) might be delivered as a “delta update” to an old version. If this is
the case, exporting that application won't result in a complete bundle. You can see the files that the package will actually
install, but the end result will not be the same as what the macOS Installer would produce.
Likewise, a package might deliver a file as a “binary patch” to an existing version (in
bsdiff format). In this case, the item exported by Suspicious
Package will be the patch rather than the result of applying the patch to the original file, as the macOS Installer would do.
If you are suspicious of a package, the last thing you want is for an exported file to be inadvertently opened, especially if it's
an application.
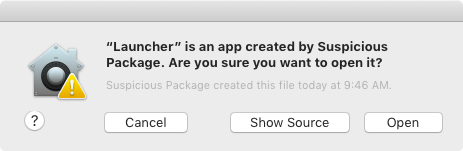
To minimize this risk, Suspicious Package will mark all exported items as if they were “downloaded from the Internet,”
much as Safari does (macOS calls this a quarantine). If the exported item is opened, Gatekeeper may block it, or at least present a warning
before opening, such as shown here.
Gatekeeper says that Suspicious Package “created” the file, simply because it wrote the file after exporting. If you click
the Show Source button, macOS will open the source package using Suspicious Package.
Examining Install Scripts
In addition to installing files, a package can contain “install scripts,” which are run by the macOS Installer. These scripts
typically run as the root user, and can do anything (with some limitations imposed by the System
Integrity Protection feature of macOS).
There are countless legitimate reasons for a package to have install scripts
— starting and stopping background processes, cleaning up and rebuilding caches, and so on. But a malicious package could take advantage
of this mechanism to wreak havoc, and even well-intentioned-but-buggy packages might do damage.
To see the install scripts that the package contains, select the All Scripts tab:
Or use Window > All Scripts (Command-3).
Unfortunately, the hard part is actually auditing the install scripts for safety, which requires
knowledge of the scripting language being used. Suspicious Package tries to give a few clues, but it can still be a challenge.
As a general rule, the less you understand what the install scripts do, the more you should
trust the distributor of the package before installing it — and the more carefully you'll want
to vet the package signature (to ensure that the distributor is really who you think it is).
The Scripts Browser
On the left side of the All Scripts tab, a browser pane shows all of the install scripts in the package.
If the package uses folders to organize its scripts — most do — these will be shown as well.
A package typically contains one or more sub-packages — known as component packages
— each of which can contain its own set of scripts. For this reason, the scripts in the browser pane are usually grouped by component package.
If the top-level package also contains scripts, these are grouped under an “Installer Package” heading at the top of the browser.
The Many Flavors of Install Scripts
The macOS Installer has specific “hooks” for running install scripts — a preinstall
script is run before the package files are installed, and a postinstall script is run after. That sounds
very simple, but you will often see more than just these two files in the scripts browser.
In fact, a preinstall or postinstall script can, in turn, run other scripts, or even standalone applications. So even
though the macOS Installer does not directly run anything but preinstall and postinstall, the other scripts
in the package are likely still used (or they wouldn't be there).
The scripts browser shows all the scripts, including any “indirect” ones. (The indirect
scripts are sometimes put into subfolders within the package, but that is at the whim of the package creator.)
Generally, to understand how the indirect scripts are run, you have to start at the top — preinstall and postinstall
— and work your way down. Suspicious Package can help a bit by searching for where
an indirect script is invoked.
Packages that come from Apple use a convention where a generic preinstall script runs all of the scripts in the
sibling preinstall_actions folder — and likewise with postinstall and postinstall_actions.
When you're looking at an Apple package and see this pattern, you can usually focus on the actions folder instead.
But be careful not to make this assumption in non-Apple packages, because the “generic” top-level script
might not actually do what you expect!
View An Install Script
Most install scripts are in a plain text format — usually a scripting language like Perl, Python or Ruby, or the
Bourne or Bash shell. If you select a plain text script in the browser, the text of the script will be shown in the center pane:
The Info pane on the right will show metadata about the script, including some clues about how the script will be run.
(If the Info pane isn't visible, click the Get Info toolbar button
to show it.) The “When” field indicates which macOS Installer hook applies — preinstall
(“Before moving files into place”), postinstall (“After moving files into place”) and so on.
The “Arguments” table describes the command-line arguments that the macOS Installer will pass to the script,
in terms of the current scripting language.
For an indirect script, the “When” will be shown as unknown. If you click the Search For References button,
Suspicious Package will search for all scripts that contain the indirect script's name, and will show those matching scripts. This may
help you figure out how the indirect script is used, presumably by some preinstall or postinstall script. However, keep in
mind that Suspicious Package doesn't actually understand what any of the scripts do; this is just doing a simple text search.
You can also search for text within the current script. Use Edit > Find in Script (Command-Option-F),
and enter the text to find in the search bar at the bottom of the center pane:
Alternatively, if you select some text and want to find other instances of the same text, you can simply use Edit > Use Selection for Find (Command-E).
You can also use the macOS Quick Look feature to preview an item selected in the scripts browser,using the Quick Look toolbar button
,
or File > Quick Look Item (Cmd-Y). For plain text scripts, you might want to do this if you have a
syntax-aware preview extension installed, allowing you to inspect the script with syntax coloring. For binary scripts, you might
have a different preview extension — such as Apparency — that can give you useful
information.
Some install scripts are not in a plain text format at all. For example, a script might be a binary (“Mach-O”)
executable, which is especially opaque. (There are sometimes good reasons for having binary executables as install scripts, such as needing
access to an API that can't be used from a scripting language, so this isn't necessarily a sign of subterfuge.) In such cases, you
might try a Quick Look preview (see above), try opening the script in another application, or if it's an
indirect script, searching for references.
Or, you might simply need to focus more on other evidence of trustworthiness, such as the identity of the distributor.
Open Scripts in Another Application
If you prefer to view a script in another application — or if the script is not plain text and can't be shown — you can
tell Suspicious Package to open that script differently using File > Open Item With.
Suspicious Package picks a default application (based on the script kind), which can be opened with Command-Shift-O.
If you want to change the default application for all scripts of the current kind, hold down Option and use
File > Always Open Kind With. This is all meant to work like the Finder's Open With feature.
You can also tell Suspicious Package to open a script with the Finder, which means that the script will be revealed
in a Finder window. This can be helpful if you want to manipulate it in the Terminal, or in some application that can't
directly “open” the script (but can import it or analyze it in some other way).
When you use the Open With command, Suspicious Package writes the script to a temporary location, and hands
that temporary copy off to the chosen application. All of these temporary files are removed when you close the Suspicious
Package window for that package. If you want to keep the script around longer, you will need to copy it somewhere else,
e.g. by telling Suspicious Package to open it with the Finder, and Option-dragging it elsewhere.
Going Backward & Opening Additional Tabs
The All Scripts tab works like the All Files tab, in that it keeps a history of the scripts that you've selected.
To retrace your steps, click the Back toolbar button
or use Go > Back (Command-[). Or hold the Back button down momentarily to jump back to a specific point in the history.
You can also open additional Scripts tab as needed. For example, you might want to leave a script open in a separate tab to
remind yourself to come back and examine it more closely. To open the currently selected script in a new tab, use
File > Open in New Tab (Command-T).
Searching and Filtering in Install Scripts
In addition to finding text within a single script, you can also search across all install scripts
for specific text (among other attributes). This works much the same way as searching in the All Files tab.
Searching Plain Text Content
To search for plain text scripts that contain specific text — perhaps an interesting command name — use
Edit > Search Package (Command-F). Enter the text in the search field and press Return to do the search:
Suspicious Package will enable the matching scripts in the scripts browser (and disable everything else). You can then select any
matching script, and the matching text within the script will be highlighted. Use the navigation buttons in the search bar to move
between the matches within each script:
Filtering on Other Attributes
The plain text content of scripts is usually the most useful thing to search, but if you need more control, you can add other rules,
as in the All Files tab.
First, enter search mode using Edit > Search Package (Command-F). Click the add button
on the right side of the search bar. Then you can add and edit rules as needed.
Note that the Go menu will list whatever saved searches are appropriate for the currently selected tab. So you must
select an All Scripts tab in order to see the saved Script searches.
Checking the Package Signature
An installer package can be signed with a digital certificate, both to identify the distributor, and to enable detection
of any subsequent tampering with the package contents. Suspicious Package evaluates the digital signature and assigns a general
category of “trust” to the signing certificate. It also allows you to examine the details of the entire
“certificate chain.”
The Gatekeeper feature of macOS also evaluates the signature
of any package that was downloaded from the Internet. With the default Security preferences — “Allow apps downloaded
from App Store and identified developers” — macOS will refuse to open a downloaded package that was not signed
with an Apple-issued “Developer ID” certificate: more on this below.
Trustworthiness of the Signing Certificate
To see how the package was signed (if at all), select the Package Info tab:
Or use Window > Package Info (Command-1).
Suspicious Package shows the name of the certificate that signed the package, along with a
trust type, such as Developer ID
If the package is simply not signed, Suspicious Package will say so:
The trust type is assigned by Suspicious Package, based on the validity and trust of the signing certificate.
It will be one of the following:
Trust Type
Description
Apple Inc.
Package was signed with a valid Apple certificate, for distribution of software through www.apple.com, the App Store
or macOS Software Update.
Developer ID
Package was signed with a valid Developer ID certificate, which was issued by Apple to a third-party developer, for distribution of
software outside of the App Store. You can read more about Developer ID certificates below.
valid
Package was signed with a certificate that was issued by a certificate authority which is generally trusted by macOS (but which is not
an Apple or Developer ID certificate). See more below.
not trusted
Package was signed with a certificate that is not trusted by macOS, nor issued by a trusted certificate authority.
expired
Package was signed with a certificate that has expired or been revoked by the certificate authority.
All certificates expire after some amount of time. Or a certificate might be revoked because it has been lost or stolen.
In certain cases, macOS can verify that a package was signed before the certificate became invalid (where the signature
contains verifiable time-of-signing information). Thus, a package signed by an expired
or revoked certificate might still be classified with one of the above valid trust types.
revoked
marked as trusted
Package was signed with a certificate that would not normally be trusted by macOS, but which is marked as trusted on
your computer. You should see this only if you opened Keychain Access and changed the “Trust
Settings” for the certificate, or if you have an IT department that did so globally.
Gatekeeper and Developer ID
A “Developer ID” certificate is issued by Apple under the Gatekeeper program.
Developers registered with the Apple Developer Program can get Developer ID certificates, and use them to
sign their packages (and applications). Suspicious Package assigns the Developer ID trust
type to packages signed with a valid Developer ID certificate.
Since Developer ID certificates are tied to the Apple Developer Program, and since that program usually requires
real names (or other proof of legal status,
e.g. for a corporation), the name of a Developer ID certificate is a bit more likely to be meaningful. But note that Apple doesn't
make any explicit promises about vetting of Developer ID identities (see the Developer ID
Certification Practice Statement on the Apple PKI page).
Moreover, like any certificate, a Developer ID certificate proves only identity (at best) and not benign intent.
Apple doesn't know that someone enrolled in the Apple Developer Program won't try to distribute malware. But if Apple discovers
that a Developer ID certificate is being used for that purpose, they have the ability to revoke the certificate (and
in all likelihood, terminate the developer's account). Apple can also revoke a certificate at the developer's request, if
the certificate has been lost or stolen.
Suspicious Package assigns the revoked trust type to packages signed by
a revoked certificate (unless it can be verified that the package was signed before the certificate was revoked). Gatekeeper
will also prevent such packages from being opened in the macOS Installer.
Notarization and Packages
Starting in macOS 10.14 (Mojave), Apple introduced the concept of “notarization” for software distributed outside
of the App Store. After signing with their Apple-issued Developer ID certificate, the developer uploads their
software to Apple's notarization service, which (a) checks that certain macOS security features are enabled (to mitigate the
risk posed by legitimate software that might become compromised), and (b) performs an unspecified check for malware.
The exact nature of the malware check is vague, probably purposely so, and seems likely to change over time. The value of these checks
is a matter that you can find hotly debated on the internet, and we have neither the expertise nor the motivation to wade into it.
Starting in macOS 10.15 (Catalina), Gatekeeper requires that all software be notarized. In macOS 10.14 (Mojave),
notarization was generally optional, except for a few special cases introduced in the 10.14.5 update.
Software that has been notarized by Apple is identified by a cryptographic digest (part of its code signature), such that macOS
can contact an Apple server at launch time (probably only the first launch) to see if the software was indeed notarized. There is
also a provision to attach a cryptographically-signed version of the notarization information to the software
— Apple calls this stapling a notarization ticket. Stapling is optional, but
allows Gatekeeper to check the notarization even if your Mac is not currently connected to the internet.
So what does all this have to do with macOS Installer packages? Apple's notarization service supports (at this writing) three different
container formats for the software to be notarized: disk images, zip files and installer packages. Regardless of the type of container,
the software inside is checked and, if approved, notarized. If the container is a disk image or installer package, that container is also
notarized, allowing it to be checked before it is opened or installed.
Hence, a macOS Installer package can be notarized, which presumably covers everything installed
by the package. A package has its own cryptographic digest, which means that the notarized package can't be modified without
invalidating the notarization. (For the xar-savvy: the package digest is
the checksum of the TOC, which is also the basis of the package signature.) Suspicious Package checks to see if the package is notarized,
and if it is, shows this information on the Package Info tab as follows:
We have no advice about how much comfort you should take from notarization. The fact
that Apple doesn't show notarization status anywhere — aside from a bland statement in the Gatekeeper alert
that “Apple checked [the package] for malicious software and none was detected” — might suggest
how much they want to promise. Certainly, malware has been notarized in the past, although Apple has been quick about revoking
such notarizations promptly once discovered. What Apple says publicly about notarization in its user-facing (as opposed
to developer-facing) documentation is not much.
Suspicious Package doesn't require that the package be stapled in order to detect notarization — it uses the
spctl(8) command, as described below — but if it is stapled,
this will also be noted (as shown above). If you click on the “Notarized by Apple — Stapled Ticket” line,
Suspicious Package will show details about the stapled ticket:
This shows the cryptographic digests that are covered by the ticket: one of these corresponds to the package itself,
but individual executables within the package are (usually) explicitly notarized as well. Where possible,
Suspicious Package will map each digest to an executable and a processor architecture (the latter because code signatures
are applied per-architecture, so a Universal executable will have more than one digest). Suspicious Package also shows
details of the Apple signature that validates the ticket itself.
Suspicious Package retrieves the notarization status from the macOS spctl(8) command,
which is as close as Apple gets to providing an API for notarization information. For reference, the actual command used is:
This will return Notarized Developer ID as the source if the package's cryptographic digest
is registered on Apple's servers. The package need not be stapled for this to work. Even legacy packages can be retroactively
notarized with Apple, so a package that you downloaded long before Mojave existed might still show up as notarized.
If a package is notarized but not stapled, anyone can staple it, as long as you have Xcode (or the
Command Line Developer Tools) installed:
/usr/bin/stapler staple the-package
This will contact Apple's servers to get the notarization ticket, and attach it to the package. Once you've done this,
you can open the now-stapled package in Suspicious Package and inspect the ticket, as described above. This might be
interesting to examine which executables within the package were covered by the notarization.
Interpreting Other Valid Certificates
Although Developer ID certificates have special status for Gatekeeper, a package can instead be signed with a certificate issued
by another certificate authority. As long as the certificate
authority is trusted by macOS (and the signing certificate otherwise checks out), Suspicious Package assigns the
Valid trust type.
That said, a certificate issued by a third-party certificate authority may actually tell you very little. There are different
standards of validation for certificates; for example, domain validation
requires only that the requestor demonstrate control over a domain name — and the certificate identifies nothing more than
that domain name. How much this is worth depends on much you trust the organization that owns that domain name — and how
confident you are that you know who owns that domain name!
Also keep in mind that no certificate proves benign intent, only some level of identity. Arguably, a third-party certificate
authority has less interest in tracking how certificates are used, simply because they have no vested interest in the security
of the macOS platform. So there's that.
Fortunately, with the advent of Gatekeeper and Developer ID, there is not much reason to use third-party certificate authorities
for signing macOS installer packages (or applications), so you are unlikely to see them very often.
Packages signed with third-party certificates, even if trusted by macOS, will not be allowed to open by Gatekeeper.
Indeed, you may find that you can't even open them in Suspicious Package. If you want to override Gatekeeper — at least to
open them in Suspicious Package — you can Control-click on the package, and choose Open With > Suspicious Package, and
Gatekeeper will give you the option of opening the package despite the signature issues.
Inspecting the Complete Certificate Chain
Occasionally, you may want to see more information about the signing certificate, or the certificate authority that issued it.
On the Package Info tab, click on the package signature line:
Or use Window > Signature Details (Command-5).
Suspicious Package will display the standard macOS certificate trust sheet:
If you click Show Certificate, you can see the complete information about the signing certificate, and the entire chain
leading to the certificate authority. As in any other application, you can select an individual certificate in the chain,
and click the disclosure arrow next to Details to see more information. (You can even export the
certificate by dragging the certificate icon and dropping it in the Finder; this will give you a DER-format file that you can open with
Certificate Assistant, or command-line tools like security(1) or OpenSSL x509(1).)
For an explanation of the signing date and time that might be shown here (as in the example above), see
the FAQ.
Detecting a Modified Package
Once you've determined that you trust the signing certificate, there's still one more piece to the puzzle: ensuring
that the package wasn't modified after being signed by the certificate.
Upon opening a package, Suspicious Package begins checking for various potential issues in the background. Using the signature to
detect possible tampering is one of these checks. (It is done in the background because it can take a
significant amount of time, especially for large packages.) If a problem is found, Suspicious Package will flag it as a critical
issue: see Reviewing Potential Issues.
The macOS Installer will do the same verification of the signature. If this fails, the
macOS Installer will stop with an error before any file has been installed, and before any install script has been run. So,
waiting for Suspicious Package to do the verification is not strictly necessary, but if you're particularly suspicious of a
particular package, you might want to let it do so anyway.
Reviewing Potential Issues
When you open a package in Suspicious Package, it loads information about the installed files and the install scripts,
and then it begins to check the package for a number of potential issues. You can go ahead and examine the installed files
and scripts while these checks run. The Review toolbar button will show the progress of these checks
,
and will change to show the result when the checks are complete
.
If Suspicious Package finds any potential issues, you'll want to review them before deciding that the package is safe to install.
Click on the Review toolbar button
and then click Review Details.
Or use Window > Review Details (Command-4).
Either way, Suspicious Package will open a new tab named Review:
Here you can see descriptions of each of the potential issues. For some issues, there will be a button
to get additional information.
Suspicious Package attempts to classify issues by severity. Critical issues are generally clear-cut problems that
should raise a red flag. Warnings are suspicious, but after understanding what is going on, you may wish to proceed.
Informational issues are typically of minor interest. Of course, these classifications are all somewhat arbitrary,
so you should read and understand all issues before deciding to install the package.
Always remember that Suspicious Package is not a malware detector. Even if it
finds no issues with a package, that may not mean it is safe to install. You should always
examine the installed files, installer scripts and signature information before deciding to install a package.
Especially for large packages, the review may still be in progress when you are ready to proceed. If you close
the window — or tell Suspicious Package to open the macOS Installer — before the review is complete, it will
warn you that you may wish to wait for the review to finish. Obviously, this is only relevant if you have made the
decision to install the package.
Receipts and Previous Installations
If you open a package that was previously installed on your Mac, Suspicious Package shows this on the Package Info tab, e.g.:
The previous installation might have used the same package, or perhaps a different version of that package. Suspicious
Package can give you a bit more information, but first we need to take a detour into the topic of receipts.
What Are Receipts?
Each time that the macOS Installer installs a package, it creates a “receipt” that contains
some information about what was installed. Most significantly, the receipt includes the file listing from
the package, which is also the primary source of information for Suspicious Package's All Files tab. The receipt does
not contain the scripts from the package, nor the actual installed files, of course.
If a package is composed of multiple component packages,
the macOS Installer will actually create multiple receipts, one for each component that was installed.
When you open the package in Suspicious Package, it looks for receipts that correspond to any of its component
packages, and it uses those to determine whether or not there was a previous install.
You can also access receipts directly, even if you don't have the original package. But they can be a challenge to find.
See more info.
Seeing Receipt Details
To get information about the existing receipts — or the receipts that the package might create — select the Receipts tab:
Or use Window > Receipts (Command-6).
On this tab, there is a line for each component package. Components are listed here by their component package
identifier, which is the name that macOS uses to match receipts. Also shown is the version of the component inside this package.
For each component that has a matching receipt, Suspicious Package shows the version of the component
that was previously installed, where it was installed, and the date and time of the previous installation.
The first column gives you a quick way to see how the two versions compare:
✓ a green checkmark
indicates that the receipt version is the same as the package version;
⇆ a red double arrow
indicates that the receipt and package versions differ; and
— a grey dash
indicates that no receipt was found for that component.
If you want to see the files that were installed by the previous version of a component, you can double-click
on that row, and Suspicious Package will open the actual receipt in a new window.
Be aware that some vendors are sloppy about the use of component version strings, and may not change
them when the package content changes. So even if the version number in the package is the same as that in the
receipt, there is still a possibility that the actual content has changed.
Comparing Packages with “Diffable Manifests”
If you want to compare two packages — for example, to find what has changed from one
version of a package to another — Suspicious Package has some tools that can help.
Of course, most of the content installed by a package will be in some binary format — Mach-O
executables, binary property lists, compiled nib files and so on. There are some excellent apps for comparing
two directory structures, but we're not aware of any that can make sense of arbitrary binary files. So simply
extracting the entire package payload is not very helpful — and could get very large, besides.
Moreover, you might be interested in how other aspects of the package have changed. For example, the
install scripts might do different things, or the signing certificate may have changed.
Suspicious Package attempts to address these difficulties with what we call a diffable manifest. This is
a folder that contains metadata about the installed files, scripts and other package attributes,
in a way that can be archived and compared. For example, you might export a diffable manifest for version 1 of a
package, and check it into a Git repository. Then, later, when you get version 2 of the same package, you might
export another diffable manifest, and use git difftool or the like to see what's changed.
Alternatively, Suspicious Package offers a Compare Packages command, which
creates a diffable manifest for each package, and sends them directly to a comparison app.
Understanding Diffable Manifests
A diffable manifest is simply a folder that contains a few specific subfolders:
In the All Files subfolder, you'll find the same folders and files as the package would
install, except that the actual files are replaced with small text files that contain the file kind, its
ownership and permissions, its size and (for executable files) the supported architectures, code-signing identities,
entitlements and so on. These files might also include a couple of different types of digests for detecting
changes, as discussed further here.
In the All Scripts subfolder, you'll find the actual scripts run by the package, at least
where those scripts use a text-based format; binary scripts are represented by metadata text files as in
the All Files subfolder.
In the Package Info subfolder, you'll find text files that capture general information
about the package, details of the package signature and so on.
The basic idea is that every file in the diffable manifest is plain text that can be compared, while directories
capture the structure of the package payload, and can be navigated like any folder hierarchy (using the Finder or
a comparison app). Additionally, any relative symbolic links within the payload — commonly found inside
frameworks, for example — are reconstructed in the diffable manifest, and can also be navigated.
Since it represents the entire package payload, the directory structure of a diffable manifest isn't any simpler
than the actual payload, of course, but it will be significantly smaller — and, we hope, more easily comparable.
You can adjust some aspects of diffable manifests by going to
Suspicious Package > Preferences > Compare > Diffable Manifests Include.
The preferences you set here apply to all diffable manifests, whether created
directly or using the Compare Packages command.
Of course, you'll want to be careful about changing these after having archived a diffable manifest,
since that guarantees differences that aren't due to changes in the package itself.
Exporting a Diffable Manifest
To create a diffable manifest, open the package in Suspicious Package, and use
File > Export Package as Diffable Manifest. Choose where to write the diffable
manifest folder, and click Export. When the manifest is ready, Suspicious Package
will show it in the Finder.
Unfortunately, because a diffable manifest is just a folder, you can't click on an existing version to
replace it — the standard macOS Save dialog instead opens the folder, and then you'll wind up
creating the manifest inside of it. But if you navigate to the same containing folder and enter the same
name, the old version will be replaced.
If you specify a folder that already exists, Suspicious Package will (by default) only replace the
All Files, All Scripts and Package Info subfolders inside it, leaving any other files or folders untouched.
In particular, this allows you to “overwrite” a previous version without stomping on a .git subdirectory
or the like. However, if you do want to completely replace the previous folder, click Options
and uncheck Preserve other files and subfolders, such as .git.
(The alert saying that “[The folder] already exists. Do you want to replace it?” will appear either
way, simply because that's the standard macOS Save dialog behavior.)
Starting in version 4.5, Suspicious Package includes any minimum macOS version requirements in the
diffable manifest. Although this is useful information, you might want to suppress it — say, if you've
archived a diffable manifest made with the previous version of Suspicious Package, and plan to compare them.
For this reason, Suspicious Package allows you to choose the manifest version to export: click Options
and choose either Version 2 (the current version that includes macOS version requirements)
or Version 1 (the previous version that does not).
Comparing Two Open Packages
Alternatively, if both of the packages that you want to compare are already open in Suspicious Package, you can
compare them without having to explicitly export diffable manifests.
Choose File > Compare Packages (Cmd-K). Make sure the correct packages are selected in
the dialog, and click Compare. (If you select a package that is still being reviewed,
the Compare button will become enabled once the review is complete.)
Suspicious Package will automatically export a diffable manifest for each package — to a temporary
location — and send these to the comparison app.
Suspicious Package currently supports these comparison apps:
Kaleidoscope from Leitmotif, which is all about comparing files
and folders.
BBEdit from Bare Bones Software, via
the Search > Find Differences command.
FileMerge, the crusty-but-still-functional comparison app bundled inside of
Xcode.
To change the comparison app that Suspicious Package will use, go to
Suspicious Package > Preferences > Compare > Compare Packages Using.
Don't see the comparison app you want to use? We are definitely open to adding support for other
apps, but we decided to start small here — especially since we aren't sure how useful this comparison
feature actually is. That said, if there is a specific comparison app you would like to see supported, please
let us know.
On to the macOS Installer?
Presumably, the reason you've spent all this time examining a package is to install it. Once you've made the decision
to do that, you can quickly open the package in the macOS Installer by clicking the Installer toolbar button
or using File > Open in Installer (Command-Shift-I). If you hold down Option while doing either, the package will be
automatically closed in Suspicious Package after the macOS Installer opens.
Using From Quick Look
Suspicious Package also includes a Quick Look preview extension, so you can get a quick preview of a package
from anywhere that Quick Look is supported. The traditional method is to select a package in the Finder and use
File > Quick Look (Command-Y), or just press the spacebar. But Suspicious Package
will also preview packages in other contexts — for example, if you use View > as Gallery
or View > Show Preview in the Finder:
The Quick Look preview gives you essentially the same information as the Package Info tab of the app.
Suspicious Package tries to fit the preview into the space available for it — although macOS makes us
guess about this, so you may need to resize the preview pane to see some information.
To get more details, click on Open with Suspicious Package. You can also go
directly to a specific tab by clicking on any line in the preview that highlights when you move the mouse
pointer over it, or that has a link indicator
in the large-format preview.
The “spkg” Command-Line Tool
Suspicious Package provides a command-line tool — called spkg — that can
be useful when you're working in the Terminal. You can use it to open a package at a specified path, optionally
jumping right to a particular directory in the All Files tab, or to the All Scripts tab. You can also use it to
retrieve information about the package signature — including information that is not available through the
standard macOS command-line tools.
“Installing” the Command-Line Tool
The spkg tool is delivered inside the Suspicious Package application bundle, but consistent with
our philosophy that you should decide when and how to install software on your Mac, the app does not try to
install the command line tool for you.
The easiest way to use spkg is to make a symbolic link to it, inside some directory that is already in your
shell's search path. You can get the path to the tool (regardless of where Suspicious Package itself is installed)
by using Help > About the Command-Line Tool, and clicking
Copy Path to “spkg” Tool. Then paste that into a Terminal command something like this:
ln -s ⌘V /usr/local/bin
Run spkg with no arguments to see usage information, or see the examples below.
The spkg tool relies upon other resources inside the Suspicious Package application bundle, so don't
try to copy or hard-link the tool somewhere else, or it will simply abort when you try to run it. A symbolic link
works because the executable can still find the rest of Suspicious Package relative to itself. If you don't want
to use a symbolic link, though, you can use any other mechanism that expands to the actual tool path retrieved
through Copy Path to “spkg” Tool, such as a shell alias.
Opening Packages from the Command Line
If you're already working in a directory where there's a package you want to inspect, you can quickly open it like so:
spkg JavaForOSX.pkg
This will tell Suspicious Package to open JavaForOSX.pkg, and bring the app forward. This is basically equivalent to
using the open(1) command like so:
open -a 'Suspicious Package' JavaForOSX.pkg
except that it's more succinct.
If you want to see what files are installed in some standard location, such as /Applications, you can
jump there directly, like this:
spkg --reveal-file /Applications JavaForOSX.pkg
This will open the package in Suspicious Package, as above, and then automatically switch to the All Files tab,
with the Applications folder selected.
Or if you want to go directly to the All Scripts tab, you can do this:
spkg --reveal-scripts JavaForOSX.pkg
Although the long option names are used in these examples for clarity, each of the spkg options also has
a single-character alias. For example, ‑‑reveal-file can be abbreviated as simply ‑f.
Run spkg with no arguments to see the short and long names for each option.
Checking the Package Signature from the Command Line
The spkg command also allows you to get some basic information about a package signature from the command line, without
going to the Suspicious Package app. For example:
spkg --show-signature JavaForOSX.pkg
which will print a summary to the standard output, e.g.:
Signature information for "JavaForOSX.pkg"
   summary                 : Signed by "Software Update"
   trust type              : Apple Inc.
   certificate 1 (signing) : Software Update [expires Oct 24, 2019, 10:29 AM]
   certificate 2           : Apple Software Update Certification Authority [expires Oct 24, 2019, 10:29 AM]
   certificate 3 (root)    : Apple Root CA [expires Feb 9, 2035, 1:40 PM]
Note that the “trust type” shown here is the same categorization used in the Suspicious Package
application, as detailed above.
For the most part, spkg ‑‑show-signature shows the same information as the
‑‑check-signature option on the standard macOS pkgutil(1) command. However,
spkg also shows any verified signing time, and indicates if the
package has been notarized:
Signature information for "SuspiciousPackage.pkg"
summary : Signed by "Developer ID Installer: Randy Saldinger (936EB786NH)"
trust type : Developer ID
notarized? : yesverified signing time : Nov 11, 2015 at 8:23 AMtime verified by : Apple Timestamp Certification Authority
certificate 1 (signing) : Developer ID Installer: Randy Saldinger (936EB786NH) [expires May 20, 2019 at 8:59 PM]
certificate 2 : Developer ID Certification Authority [expires Feb 1, 2027 at 2:12 PM]
certificate 3 (root) : Apple Root CA [expires Feb 9, 2035 at 1:40 PM]
As of macOS 10.15.4, pkgutil(1) includes the verified signing time
(or “trusted timestamp”) in the output of the ‑‑check-signature command.
As of macOS 12 (Monterey), pkgutil(1) also includes the notarization status.
In earlier versions of macOS, another option is spctl(8), as described above.
If you need to get more information about the certificate chain, you can extract the certificates in DER format and leverage
other tools, such as OpenSSL x509(1). For example, this simple script extracts all of the certificates
to a temporary subdirectory, and uses OpenSSL to print out some basic information from each one:
mkdir certs
if spkg --extract-certificates certs JavaForOSX.pkg 1> /dev/null; then
   for one_cert in certs/certificate_*.der; do
      echo "----------- ${one_cert} ------------"
      openssl x509 -in "${one_cert}" -inform DER -subject -nameopt multiline -startdate -noout
   done
fi
Run spkg with no arguments to get more information about the ‑‑extract-certificates option.
Listing Component Packages from the Command Line
The spkg command also allows you to get information about the component packages
that make up an installer package, without leaving Terminal. For example:
By default, spkg will truncate lines to fit your Terminal window width (unless you redirect the output), but you can
change this using the ‑‑line-width option.
If you want to use this from a script — say to extract a simple list of component package identifiers — there
is a ‑‑quiet option that makes this simpler, e.g.: